iPhone user manual
This guide covers the iPhone app. Menu names below use the English app labels. Mac and iPhone purchases are separate; records do not sync automatically.
In this guide
1. Get started and app access2. Prepare brokerage CSV files3. Find and import a file4. Filters, positions and income5. Manual entries and journal6. Export, back up and restore7. Delete data and appearance8. Privacy and help1. Get started and app access
Use Dashboard, Options, Stocks, History and More to navigate. Under More → App access, start the 30-day trial or unlock lifetime access. The trial does not automatically charge you. Restore purchases uses the Apple Account that made the purchase; it does not restore portfolio data. After the trial, viewing, reports, CSV export and backup remain available.
2. Prepare brokerage CSV files
Supported Schwab exports and IBKR Activity Statement CSV files import directly. For other brokers, download the standard transactions and positions templates from the CSV templates page. Fill them in using a spreadsheet, preserve the template metadata and English column headings, then save as CSV. No column mapping is performed on iPhone. This version reports in USD; convert non-USD values before importing and retain the original records.
Download CSV templates3. Find and import a file
Save the CSV in iCloud Drive or On My iPhone using Files. For email attachments, choose Share → Save to Files. AirDrop from a Mac is another option. Download cloud-only files first. In the app, tap Import CSV → Browse, select the file, review the preview and confirm. Import transaction history and a current positions snapshot, then reconcile the results with your brokerage statement. If a file is missing, find it in Files first and check that it is a CSV, not an Excel workbook.
4. Filters, positions and income
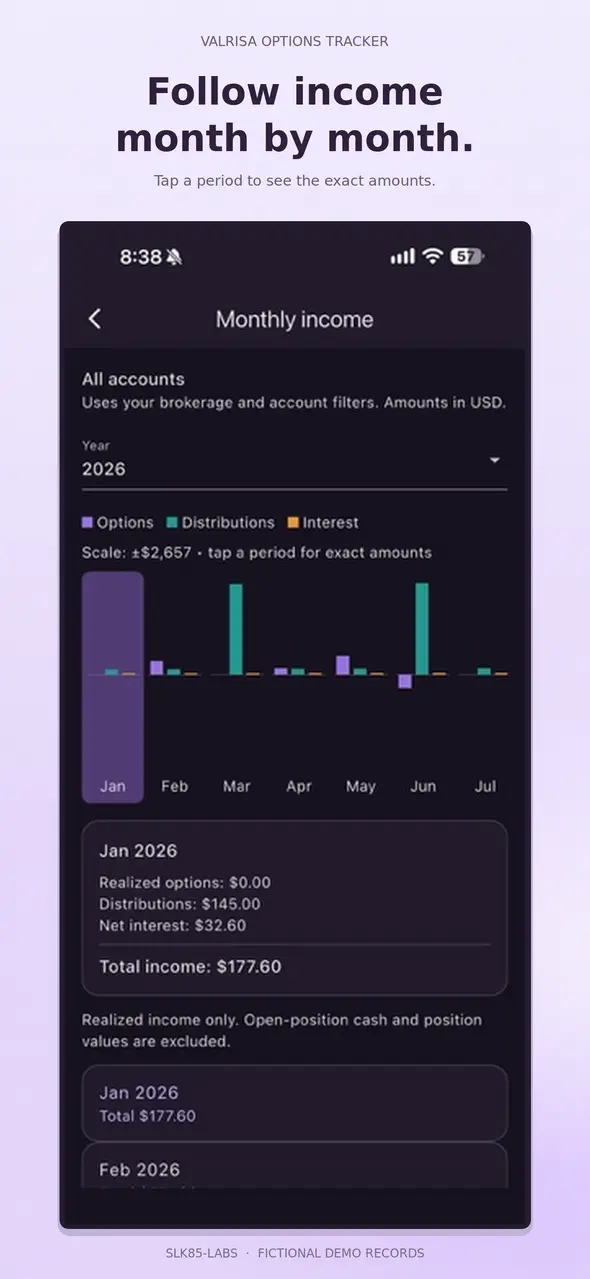
Choose the brokerage, account and reporting year to control the records shown. Options and Stocks show imported holdings rather than live quotes; History supports ticker searches. Under More, open Weekly income or Income by month for charts and exact totals. Income includes realized options, distributions and signed net interest; negative interest reduces the total. Weeks run Monday–Sunday and can cross month boundaries, so a sum of whole weeks may differ from a calendar month.
5. Manual entries and journal
Open More → Manual transaction to enter an individual stock, option or income record. Complete the required fields and tap Save; validation messages explain anything missing. Use More → Journal for notes. Check the account, quantities and signed amounts, and avoid recording a manual transaction again when importing the same brokerage activity.
6. Export, back up and restore
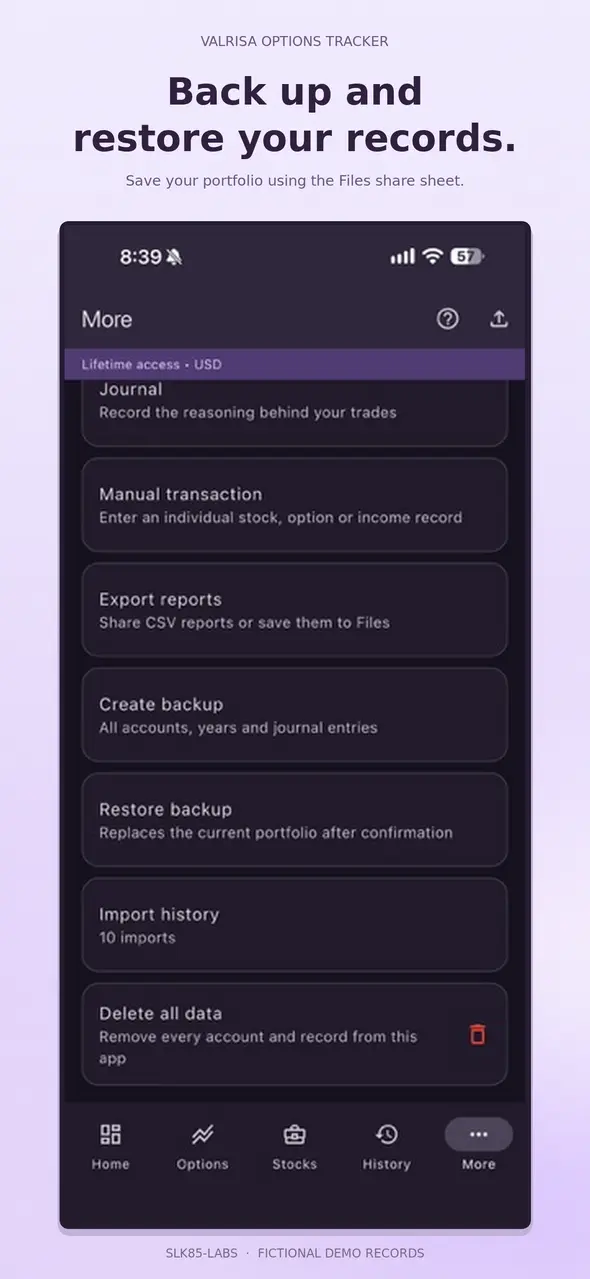
More → Export reports creates CSV reports for the selected scope. Use the share sheet to Save to Files. More → Create backup saves all accounts, years and journal entries as a full backup. Keep it somewhere you control. More → Restore backup opens a backup file and asks before replacing the current portfolio. A CSV report is not a full backup; Restore purchases restores access only.
7. Delete data and appearance
Back up first. More → Delete all data opens an “Are you sure?” confirmation. Cancel keeps your records; the red Delete all data button removes portfolio records across all accounts and filters. Trial or lifetime access and appearance settings remain. Under More → Appearance, choose Lavender, Dark or Follow System.
8. Privacy and help
Portfolio records remain locally on your iPhone. The app does not request brokerage credentials, execute trades or provide live prices. Keep your own backups. For help, use the support page and include your app version and a redacted description. Valrisa is a recordkeeping tool; check its reports against official statements.
Support · Privacy